
SX500 Speedbike FAQ
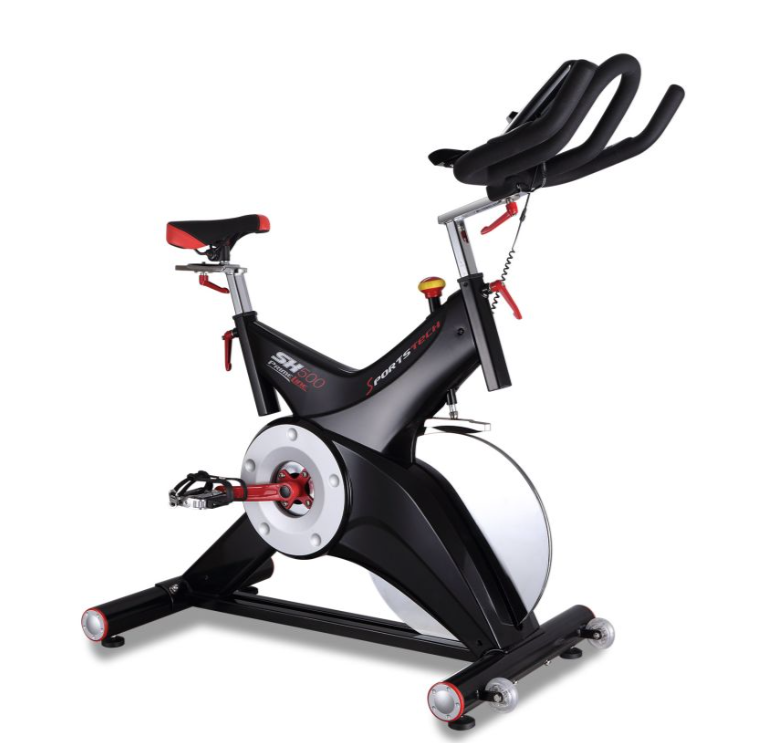
Speedbike SX500 product photo
SX500 assembly video
FAQ
Is the SX500 compatible with the Sportstech Live app?
No, it is not compatible with the Sportstech Live app. Alternatively, you can connect the Speedbike to the Kinomap app and iConsole.
Is a bottle holder included in the scope of delivery?
No, a bottle holder is not included in the scope of delivery.
Do I need to connect it to a household power outlet?
No, the SX500 does not need to be connected to a household power outlet.
What material is the brake on the SX500 made of?
The SX500's brake is made of leather, which is not only durable but also very quiet.
What is the distance from the tip of the saddle to the fully depressed pedal on the Sportstech SX500?
At both the maximum and minimum adjustment settings, the distance from the tip of the saddle to the fully depressed pedal on the Sportstech SX500 varies from 77 cm at the minimum setting to 91 cm at the maximum setting.
What does “display model” mean?
Display models are a cost-effective option for high-quality products, offered at a reduced price. These used products have either been tested by prospective customers or displayed in stores. Display models have minor signs of use, but have been carefully inspected both technically and visually.
Can you create multiple user profiles on the console?
Yes, you can create up to 4 individual user profiles.
Troubleshooting & Quick Fixes
Cracking noises coming from the bottom bracket
It looks like your equipment needs a minor repair—in particular, the bottom bracket may need to be replaced. Don't worry, we're here to help! For further assistance and a quick solution, please don't hesitate to contact Sportstech Support at sportstech.care. We'll be happy to help.
Felt brake / flywheel squeaking
To improve your workout experience, we recommend gently cleaning the flywheel and then applying a thin layer of silicone spray with a dry cloth. It would also be a good idea to check the felt pad for wear. If it needs to be replaced, you can easily find universal felt brakes for Speedbikes in stores. For direct assistance and to conveniently order the right spare part, we're happy to help via the Sportstech contact form at: https://www.sportstech.care/hc/de/requests/new We're here to help and make your workout as enjoyable as possible.
The resistance can no longer be adjusted
In this case, the entire brake lever needs to be replaced. Spare part numbers: SP_SX500_87 and SP_SX500_86 You can conveniently order the correct spare part. You can find detailed instructions on ordering the spare parts you need in this article: How can I get the spare parts I need?.
The SX500 vibrates at the height of the tension adjustment knob, creating an intolerable noise
For optimal performance, we recommend cleaning the flywheel regularly and then applying a fine layer of silicone spray with a dry cloth. It would also be a good idea to check the condition of the felt pad—if necessary, you can easily find and purchase universal felt brakes for Speedbikes. If you need assistance or are looking for the right spare part, don't hesitate to contact us via the contact form on our website at https://www.sportstech.care/hc/de/requests/new. We're here to assist you and make sure your workout goes smoothly.
How do I operate the console?
Watch the video here:
SX500 console operation
SX500 Speedbike repair instructions
How do I remove the cover?
Tools required:
- 16 mm open-end wrench
- Phillips screwdriver or a cordless drill with a Phillips bit
Safety notice:
Make sure the equipment is disconnected from the power supply before carrying out maintenance or repairs, or when it is not in use.
Steps:
- Start by removing the pedals on both sides. Use a 16 mm open-end wrench. Note that the left pedal has a left-hand thread. This means you need to turn it clockwise to loosen it and counterclockwise to tighten it when reinstalling it.
- Now remove all the screws on the left side of the cover.
- Move the pedal arm into a position where you can pull the left cover over it.
- Remove the screws holding the right cover to the frame, and pull it over the crank arm.
That's all there is to it.
Note:
Please make sure to follow these steps carefully to achieve the desired results.
How do I replace the sensor?
Tools required:
- 8 mm open-end wrench
Safety notice:
Make sure the equipment is disconnected from the power supply before carrying out maintenance or repairs, or when it is not in use.
Steps:
- Please carefully remove the cover.
- Next, gently remove any adhesive residue that may be on the sensor and sensor holder.
- The connector is located inside the frame. Follow the cable and carefully disconnect the connector.
- You can now pull the sensor out of the sensor holder.
- Slide the new sensor into the sensor holder and carefully reconnect it.
- Put the connector back inside the frame.
- Put the cover back in place.
That's all there is to it.
Note:
Please make sure to follow these steps carefully to replace the sensor successfully.
How do I replace the lower brake set?
Tools required:
- 8 mm open-end wrench
Safety notice:
Make sure the equipment is disconnected from the power supply before carrying out maintenance or repairs, or when it is not in use.
Steps:
- Start by carefully opening the cover.
- Use an 8 mm open-end wrench to loosen the two screws on the leather brake holder.
- Position the new lower brake set on the frame.
- Close the cover again.
That's all there is to it.
Note:
Please follow these steps carefully to install the lower brake set successfully.
How do I replace the SX500 bearing?
Tools required:
- Bearing puller
- Flat-head screwdriver
- 19 mm open-end wrench
- 17 mm socket
- Adjustable wrench
- Ratchet
- Punch or screwdriver
- Hammer
Safety notice:
Make sure the equipment is disconnected from the power supply before carrying out maintenance or repairs, or when it is not in use.
Steps:
- Start by removing the crank arms.
- Carefully remove the cover cap using a flat-head screwdriver.
- Use a 17 mm socket and a ratchet to loosen the nut.
- Insert a puller and use a 19 mm open-end wrench to screw it as far as possible into the internal thread of the crank arm.
- Remove the crank arm on the left side.
- Remove the rubber cover on the left side and loosen the nut underneath using an adjustable wrench or an appropriately sized open-end wrench.
- Remove the belt from the pulley on the other side.
- Pull the pulley and axle out of the frame.
- Push down slightly on the sleeve located between the bearings.
- Use a punch or screwdriver and a hammer to tap one of the bearings out from one side.
- Remove the sleeve and tap the bearing out from the other side.
- Thoroughly clean the bearing seat and apply some grease.
- Insert the new bearing into the bearing seat and tap it into place with a piece of wood and a hammer until the outer edge of the bearing is flush with the frame.
- Slide the pulley and axle through the bearings and the sleeve.
- Put the belt back on.
- Screw the nut onto the axle and tighten it slightly more than hand-tight using an adjustable wrench or an appropriately sized open-end wrench.
- Install the rubber cover and attach the crank arm to the axle.
- Fit the nut that secures the crank arm to the axle and tighten it as much as possible using the 17 mm socket.
- Attach the plastic cover.
- Reattach the covers on the left and right sides.
- Attach the pedals.
That's all there is to it.
Note:
Please make sure to follow these steps carefully to achieve the desired results.
In this video, we'll show you how to operate the console on your SX200, SX400 or SX500.
You can find all the important information in the manual.
Here you can find all the spare part numbers.