
F75 Treadmill FAQ
F75 Treadmill Product Photo
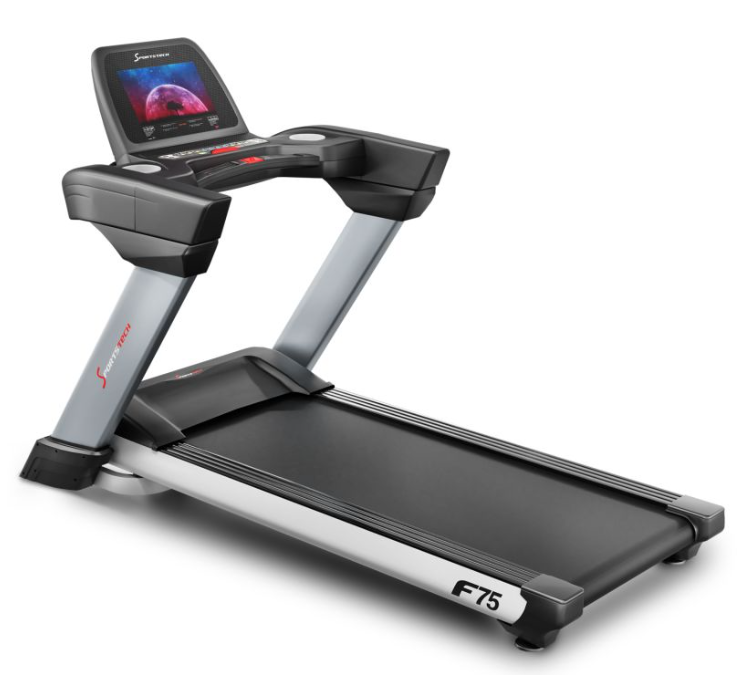
F75 Assembly Video
FAQ
How many packages is the F75 delivered in?
The F75 is delivered in 2 packages.
How can I connect the F75 treadmill to an external device?
The F75 treadmill can connect to devices such as a heart rate monitor via Bluetooth. To establish this connection, please navigate to the settings in the F75 treadmill menu, select “Bluetooth” and pair the treadmill with the relevant heart rate monitor.
What type of footwear is suitable for the treadmill?
It is important to note that treadmills are best used with athletic shoes that have smooth, flat soles. Trail shoes or shoes with studs or rough soles can cause excessive wear, which may damage the device.
What is the distance between the floor and the running surface for checking ceiling height?
The distance from the floor to the top of the running surface is 24 cm with no incline. At the highest incline, the distance is a maximum of 36 cm.
Is the F75 treadmill compatible with the Sportstech Live App?
Yes. The F75 is compatible with the Sportstech Live App. You must register with the Sportstech Live App to use the treadmill. The F75 cannot be operated without a registered user account and an active login.
What is the difference between the F75 and other treadmills?
The F75 features a very large running surface and can be used by people weighing up to 150 kg.
How much electricity does the F75 treadmill consume?
The exact power consumption depends on how it is used, but is typical for a treadmill in this class.
Can the F75 treadmill also be used outdoors?
No, the treadmill is intended for indoor use only.
What size should a floor protection mat for the F75 treadmill be?
The floor protection mat should measure at least 202 x 90 cm.
Technical specifications
Treadmill up to 20 km/h, 18 automatic incline levels up to 11%, 5-HP motor, running surface 580 x 1600 mm
What does “display model” mean?
Display models are a cost-effective option for high-quality products, offered at a reduced price. These used products have either been tested by prospective customers or displayed in stores. Display models have minor signs of use, but have been carefully checked for technical condition and appearance.
Troubleshooting & Quick Fixes
What is the password for the factory settings?
We cannot provide this password. Entering this password restarts (deletes) the entire operating system of the fitness equipment, and the device must be fitted with a new operating system. The password is only used for the factory settings, which are only accessible to the manufacturer.
What can I do if apps such as YouTube and Netflix won't update or launch?
To update apps such as YouTube and Netflix on your F75, you must first log in with a password to access the Android system. You can then update the apps.
Error SAFE – Safety Key
⚠️ Error SAFE – Safety Key
Description:
The safety key is not in place, or the magnet is too weak. Your treadmill will not start unless the key is correctly in place.
Solution:
Check that the safety key is correctly inserted in its designated slot.
Check the magnet strength – if the magnet is weak, you can try using another magnet.
If this does not help, you will need a replacement safety key.
👉 The replacement can easily be carried out at home – without voiding your warranty and much more conveniently than returning the product. If this does not resolve the issue, we will be happy to collect your device under the warranty. Don't worry: if anything does not go as planned during the replacement and the device is damaged as a result, we will of course take responsibility – provided that you have handled the device carefully and respectfully.
Applies to: all models with a safety key
ERR 04 - Error message
The error code "Error 04" or "E04" usually indicates that the device is not receiving sufficient power – this is most often because too many electrical devices are connected to the same outlet at the same time.
We therefore recommend plugging the device directly into a dedicated outlet (without a power strip) and testing it again.
How do I lubricate my F75 treadmill?
Lift the running belt slightly and apply a little oil to the running deck in the middle, from front to back. Use the oil sparingly, otherwise it may drip beneath the treadmill.
Running belt slips while running
Follow these instructions to tension your treadmill correctly:
1. Choose the right tool - Depending on the model, you will need either a Phillips screwdriver or an Allen key. One of these tools is usually included with the treadmill.
2. Adjust the tension - If the treadmill belt slips, increase the tension by turning the right and left adjustment screws a quarter turn clockwise. If the belt is sticking, reduce the tension by turning both screws a quarter turn counterclockwise.
3. Check the adjustment, now set a speed of 1-2 km/h and walk on the treadmill. If the belt slips (the motor spins without moving the belt), increase the tension. If the belt and motor are sticking, reduce the tension. Also make sure the belt runs in the center. If it does not, center it correctly.
4. If the running belt is not centered, increase the tension on the side toward which it is moving. (If it moves to the right = slightly increase tension on the right or slightly loosen the left; if it moves to the left = slightly increase tension on the left or slightly loosen the right) tighten by a maximum of a quarter turn each time, then check again that the belt runs in the center)
The display does not turn on after assembly.
Solution:
- Check whether any pins in the connectors are bent. This is often the reason why the display does not turn on.
- One connector is located at the top of the side arm and the other at the bottom of the side arm.
- Carefully straighten any bent pins. In most cases, this should solve the problem.
Maintenance & Cleaning
At least once a year, remove the treadmill's motor cover and use a vacuum cleaner to remove any dust or dirt to ensure that the motor and drive system continue to work smoothly.
Cleaning: After each use, wipe sweat off the device with a slightly damp cloth. Avoid any moisture or dampness on the electrical or electronic components. Do not use abrasive cleaners or solvents.
Maintenance: Check the condition of the device before and after every workout. Make sure all fasteners and protective covers are securely attached; tighten screws and nuts if necessary. Check that the safety clip is working correctly before every workout: Stand on the side surfaces of the treadmill. Start the treadmill at a low speed. Pull the safety clip to stop the treadmill immediately. The treadmill should not restart if the safety clip has been removed.
Lubrication: The running belt must be adequately lubricated with silicone oil to ensure the device functions properly and has a long service life. The lubrication system is located on the underside of the device. Lubrication and inspection intervals: Refill with silicone oil after the first 25 hours of operation or every 2-3 months. Check the lubrication regularly. Refill with silicone oil after no more than 50 hours of operation or every 5-8 months. To check the lubrication: Unplug the device. Lift the running belt on one side. Run your finger over the top of the running deck beneath the running belt: If the running deck feels slightly oily, it is sufficiently lubricated. If the running deck is dry, add silicone oil.
My treadmill won't turn on – what should I do?
You may often be able to fix the problem yourself without affecting your warranty.
Follow these simple steps to check for possible causes and resolve the issue:
- Turn off the treadmill and unplug it. This is important to ensure that there is no electrical connection while you inspect the device.
- Carefully open the motor cover. This is usually located underneath the treadmill and may be secured with screws or clips, depending on the model.
- Check that all cable connections are secure, especially those between the motor and the control unit. Loose or damaged cable connections can sometimes prevent the treadmill from starting.
- If necessary, firmly reconnect any loose connections. Make sure they are secure to ensure that the treadmill works properly.
- Close the motor cover and plug the treadmill back in. Once you have completed the inspection, close the cover and test the treadmill by reconnecting it to the power supply.
If your treadmill still does not work after following these steps, we recommend contacting our customer support team for further assistance. Our team will be happy to help you resolve the issue so that you can resume your workout as soon as possible.
Repair Guides
Replacing the F75 Treadmill Motor
Instructions for replacing the motor on an F75 treadmill:
Tools required:
- Phillips screwdriver
- 2x 14 mm open-end wrenches
- Ratchet set with various attachments in different sizes.
Preparation:
- Make sure the treadmill is on a level surface and unplugged.
- If possible, set the treadmill to the maximum incline. Once it reaches this position, switch off the power supply and wait a few minutes for the system to power down.
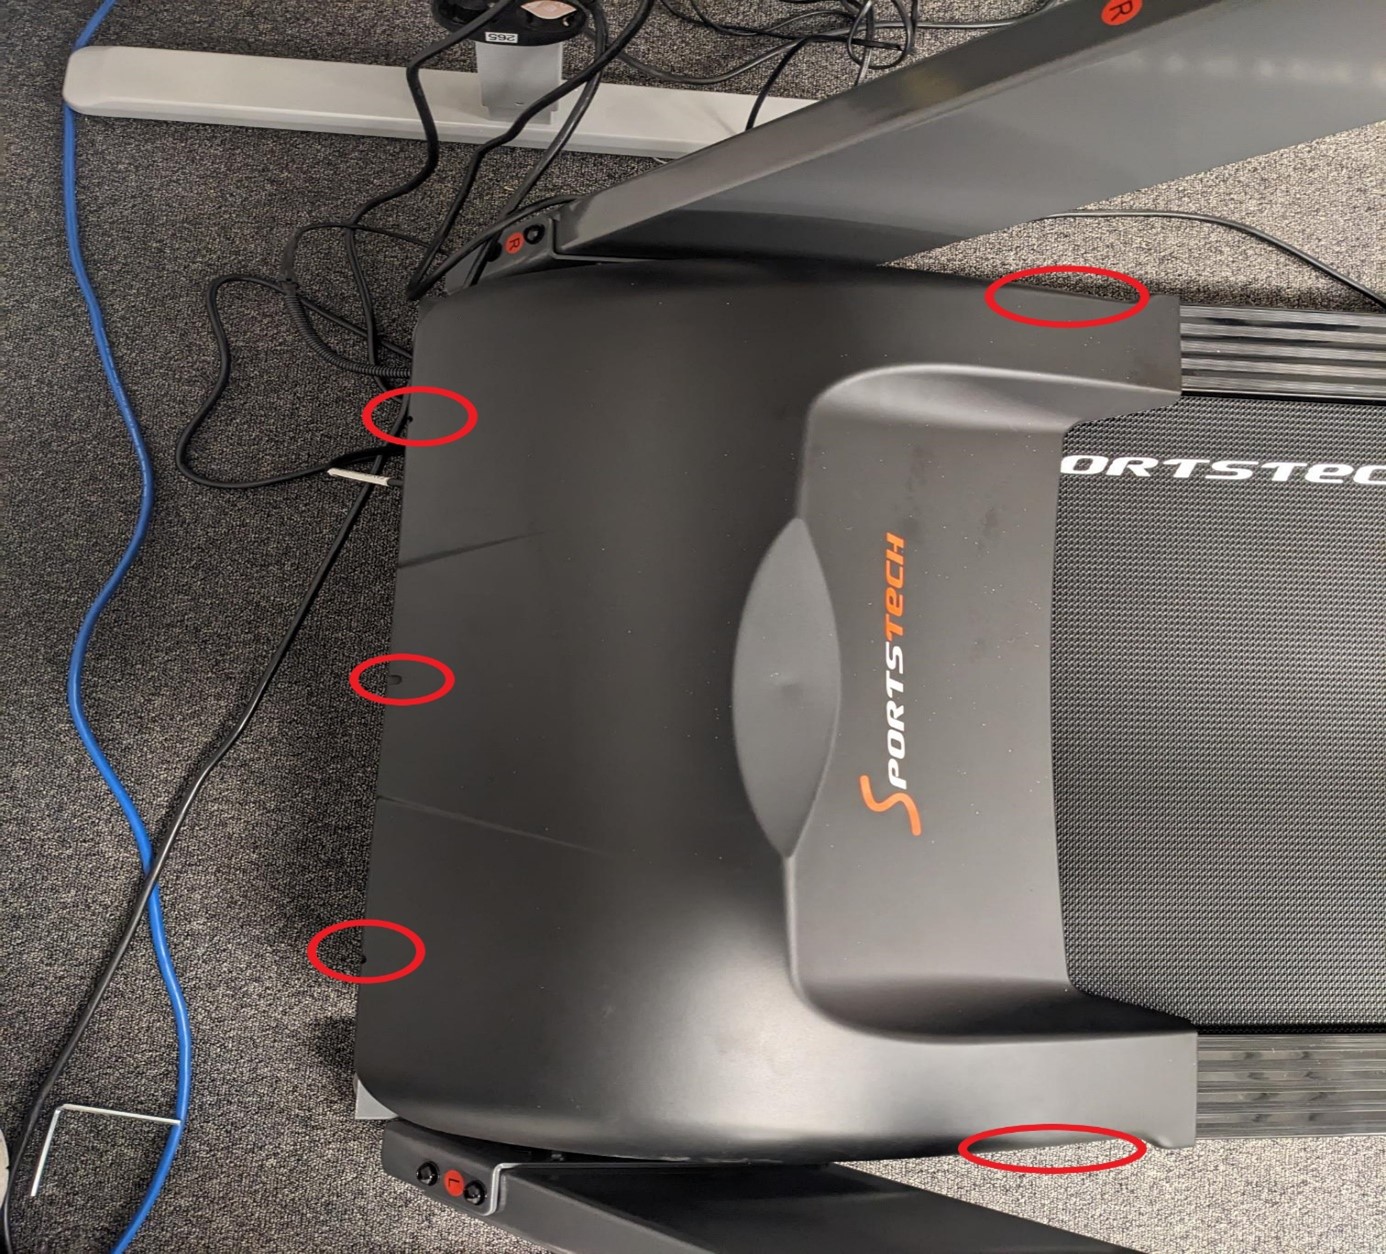
- Open the motor cover by removing the 5 screws marked in the photo.
Steps for replacing the motor:
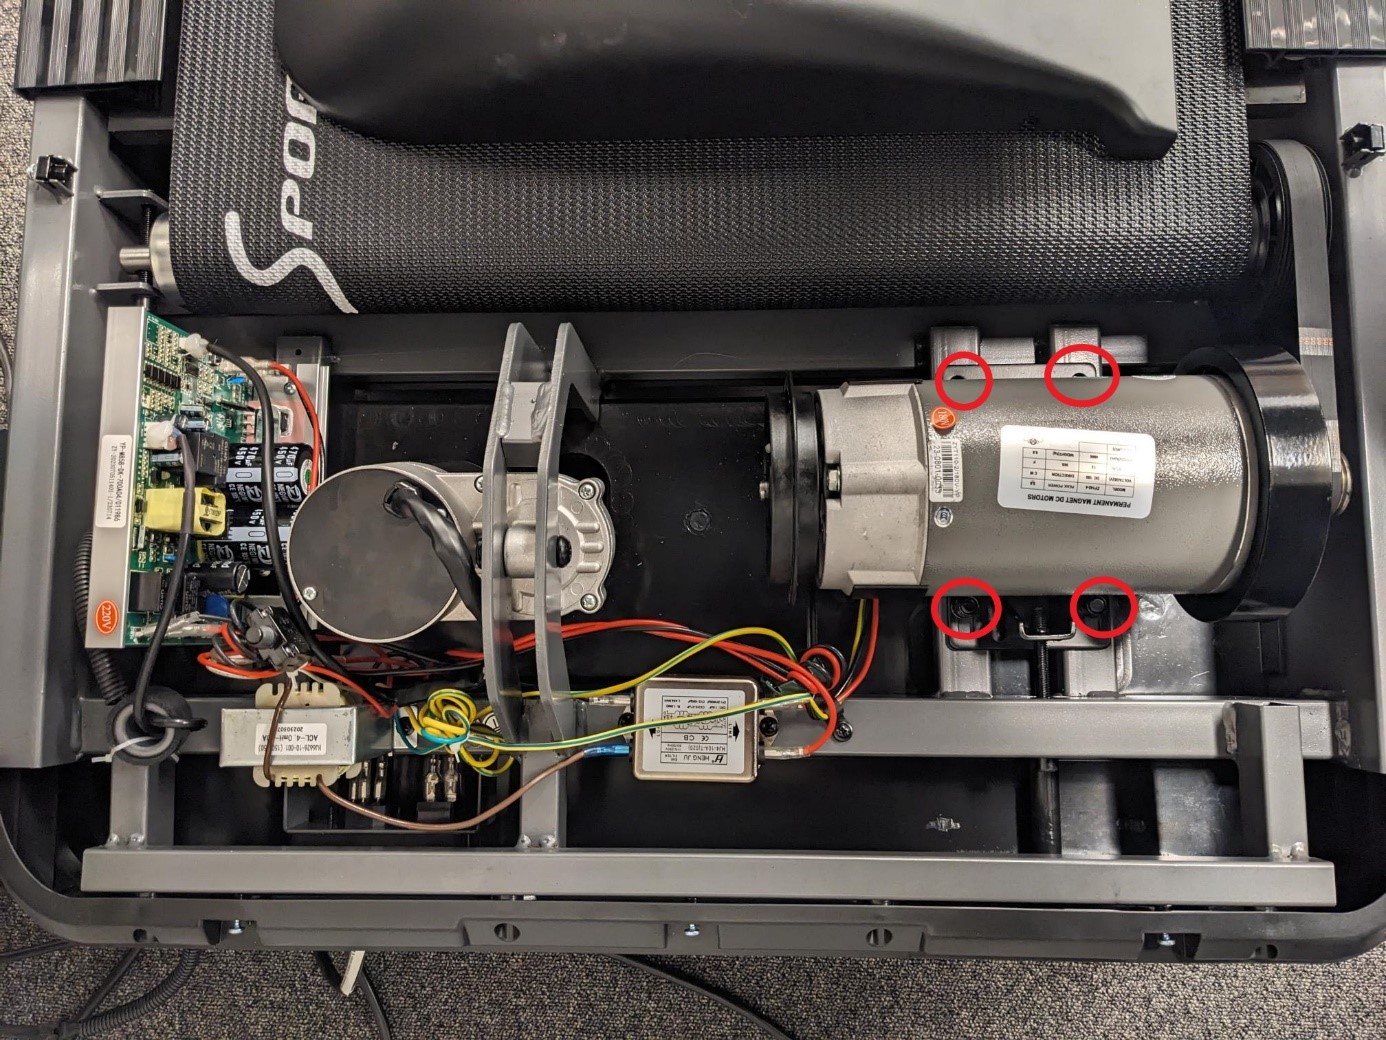
1. Loosen the four motor mount bolts.
2. Loosen the motor mount adjustment screw and remove the four mounting bolts.
3. Disconnect the cables connecting the motor to the PCB. Take a photo of the connections first.
4. Replace the old motor with the new one.
5. Connect the new motor cables to the PCB and the frame.
6. Insert the four mounting bolts, but do not tighten them yet.
7. Fit the belt, making sure it is centered on the motor shaft and the idler pulley.
8. Turn the adjustment screw and tension the belt until it can still be turned by hand by approximately 90°.
9. Now tighten the four adjustment screws.
10. Refit and secure the motor cover.
Warning:
- When the treadmill is connected to the power supply, the incline motor will automatically return it to the lowest level.
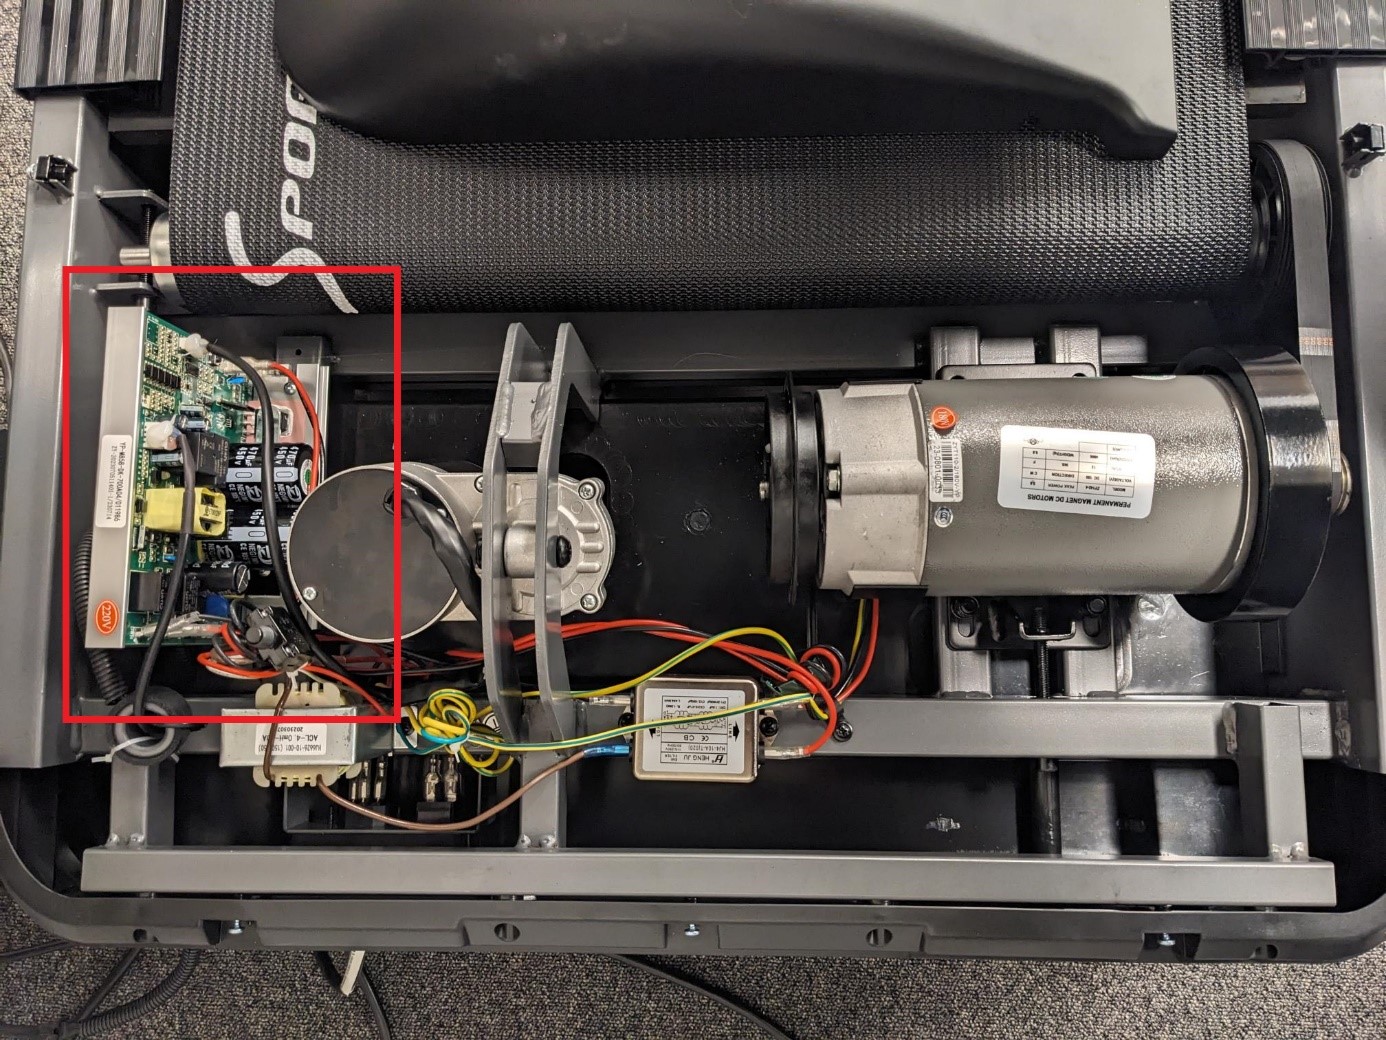
Replacing the control board (PCB)
Instructions for replacing the control board (PCB) on the F75 treadmill
Preparation:
- Make sure the treadmill is on a level surface and unplugged.
- Open the motor cover by removing the 5 screws marked in the photo.
Steps for replacing the control board (PCB):
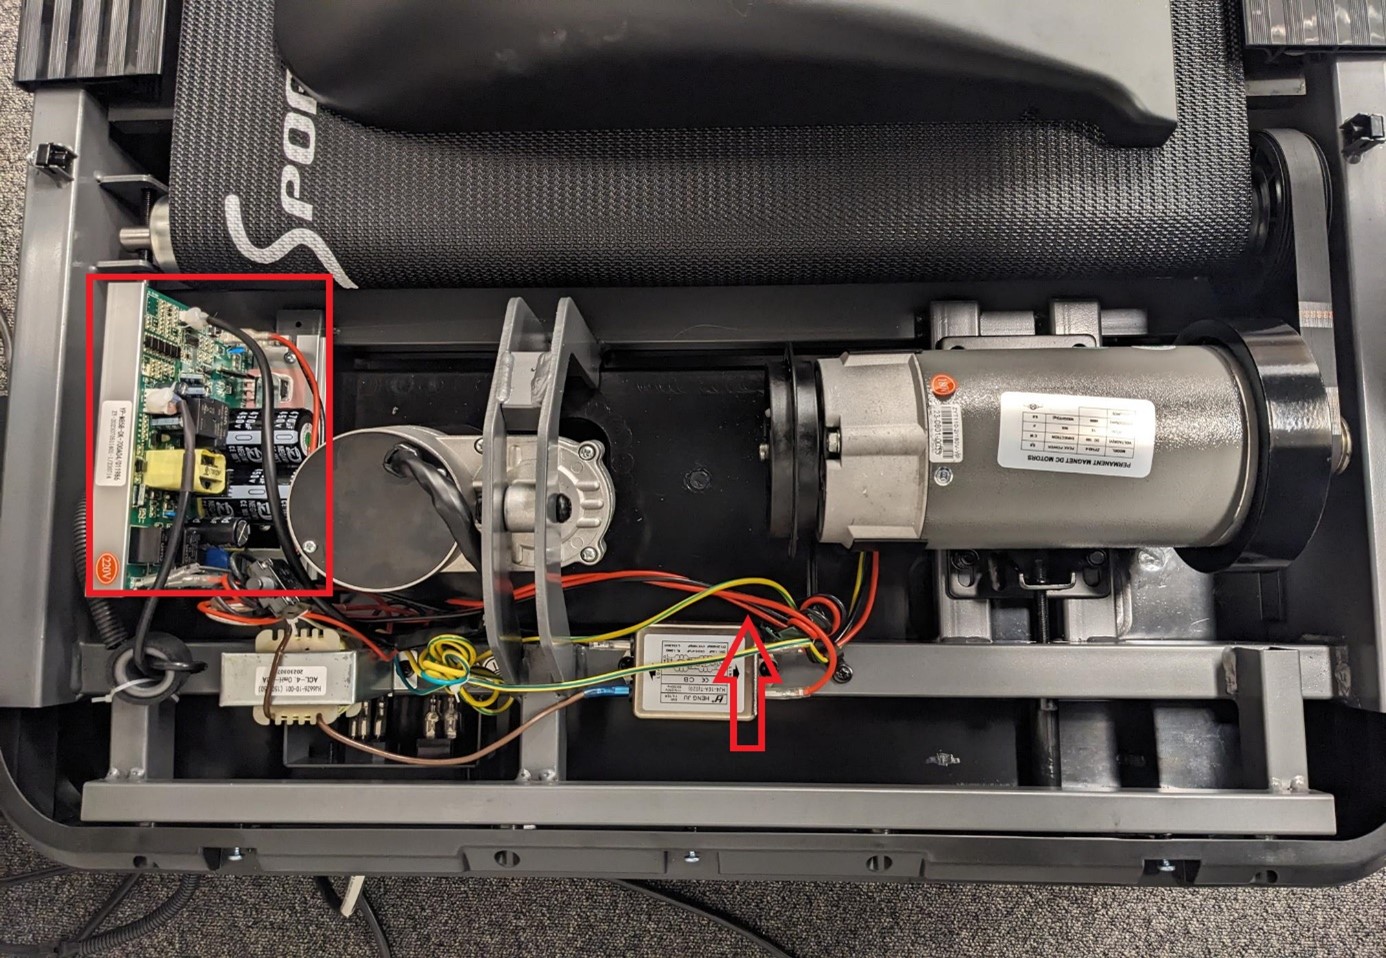
- Before disconnecting all the connectors from the PCB, take a photo of the PCB so you can reconnect all the plugs in the correct places when installing the replacement.
- Disconnect all the connectors from the PCB.
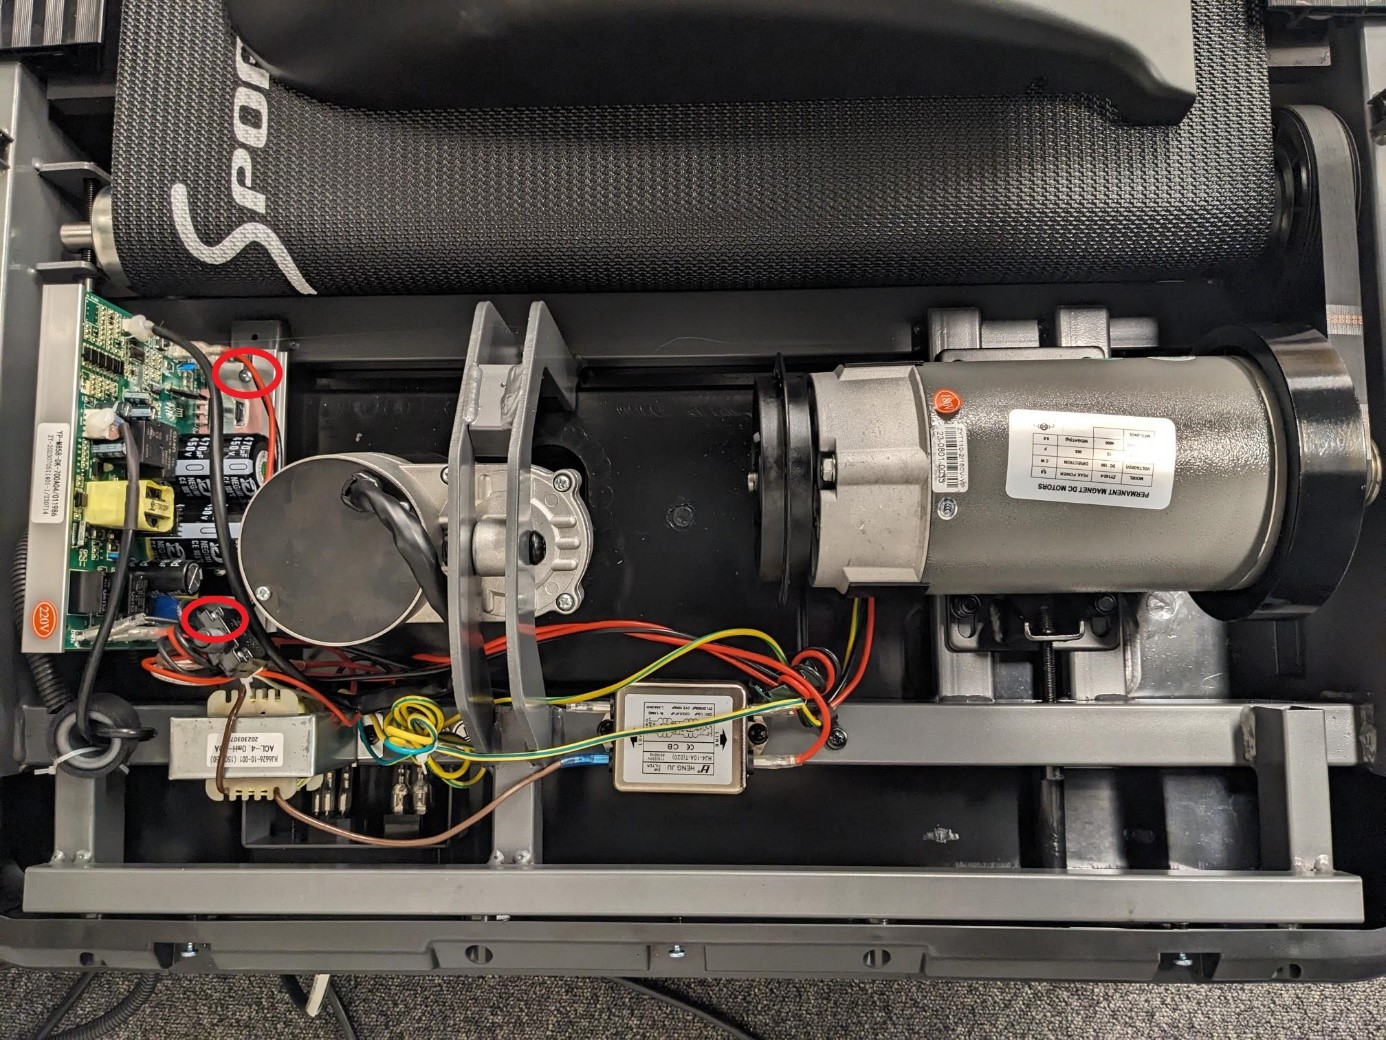
- Remove the PCB (control unit) mounting screws, a total of 2 Phillips screws.
- Remove the PCB and replace it with the replacement part.
- Connect all the cables, then insert and tighten the 2 retaining screws.
- Refit and secure the motor cover.
- Plug the device into the power supply and check that it works.
Replacing the F75 treadmill deck
Instructions for replacing the F75 treadmill deck
Preparation:
- Make sure the treadmill is on a level surface and unplugged.
- Remove the motor cover by removing the 5 screws marked in the photo.
Steps for replacing the running deck:
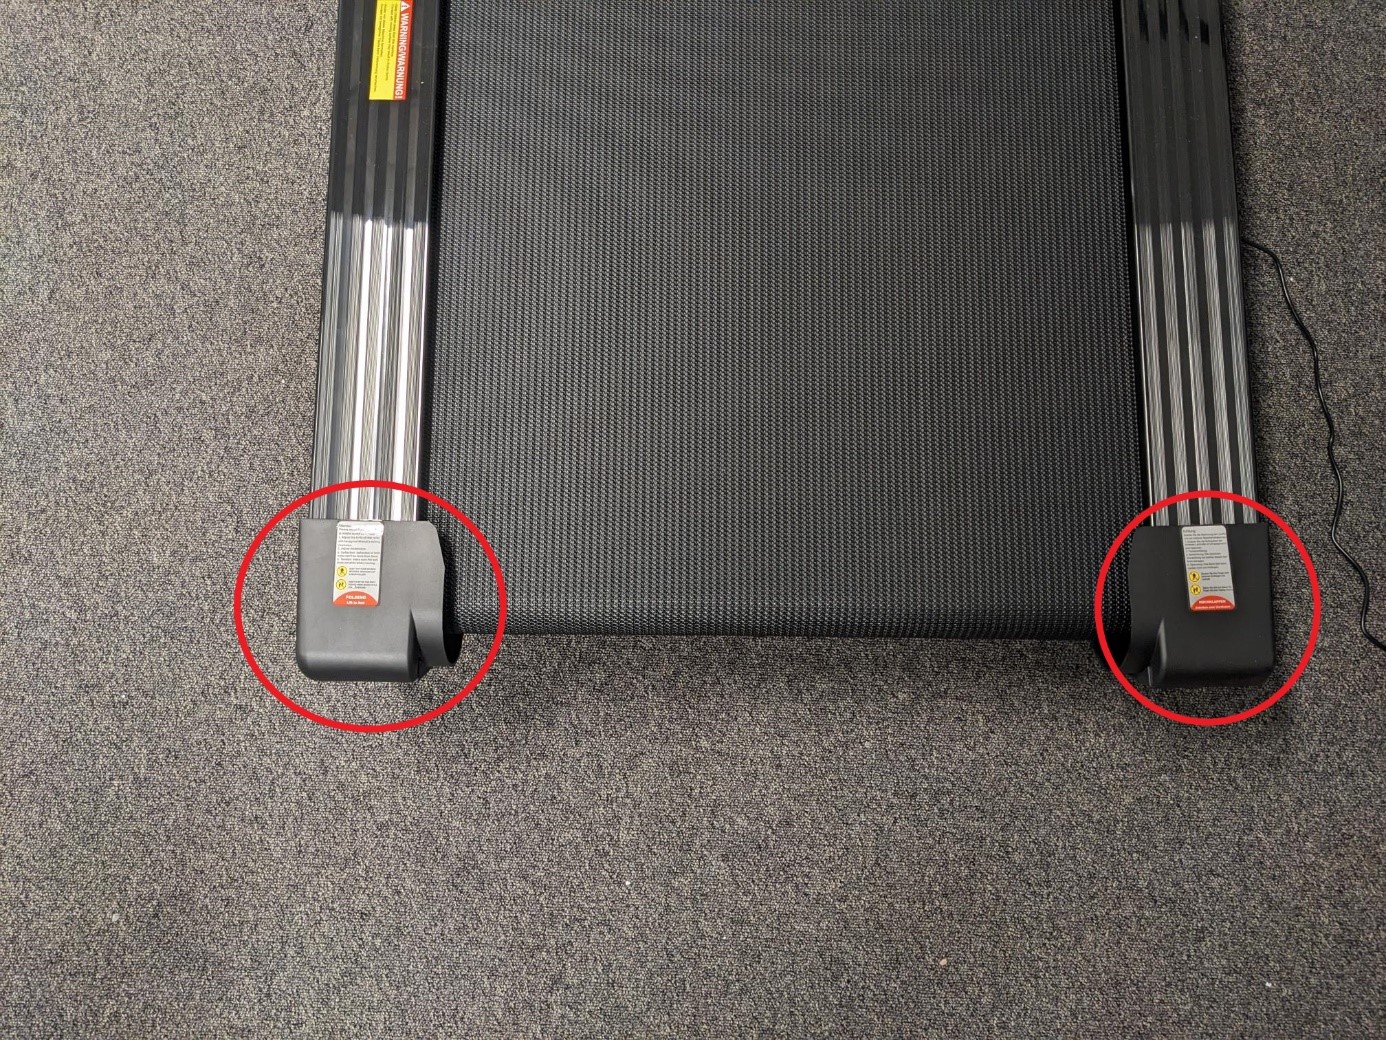
- Remove the two rear covers by lifting up the running surface.
- Remove the side rails, which can be pulled out toward the rear.
- The mounting screws are now visible; remove all the screws.
- Pull the defective deck out to the side.
- Install the new deck in reverse order.
The spare parts list contains all the individual parts used, from assembly through to use.
The manual contains all the important information.