
sTread Fold Treadmill FAQ
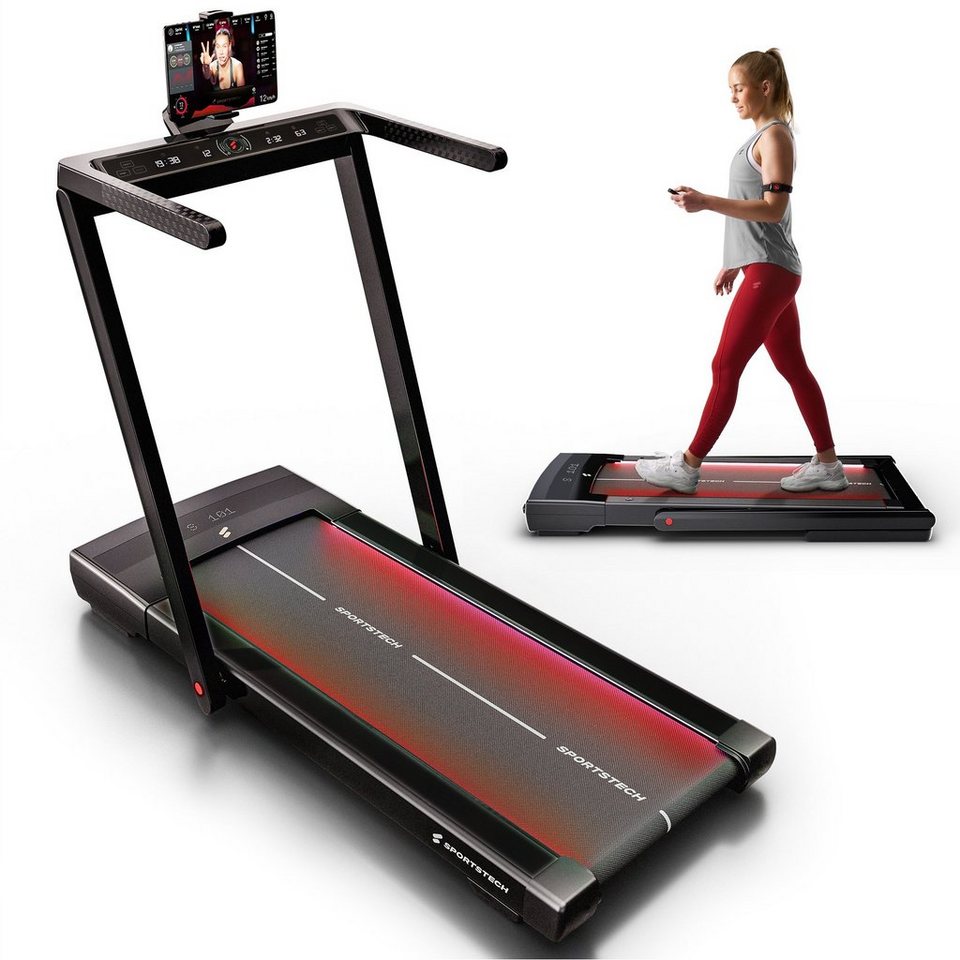
sTread Lite Treadmill Product Image
FAQ
Which oil should be used to lubricate the running belt?
Only use silicone oil or spray to lubricate the running belt.
What type of footwear is suitable for the treadmill?
It is important to note that treadmills are best used with trainers that have smooth, flat soles. Trail shoes or shoes with studs or coarse soles can cause excessive wear, which may damage the machine.
Are distances displayed in kilometres or miles?
The distance on the treadmill is displayed in kilometres.
When should the running belt on the sTread Fold be lubricated?
This depends on how often it is used. Frequent use: 3–5 times a week, apply 2–3 drops between the running belt and running deck or into the filling aid every 2–3 weeks. Less frequent use: 1–3 times a week, every 6–8 weeks.
How tall is the sTread Fold treadmill when folded, and can it be slid under a couch?
The folded treadmill is low enough to slide under most standard furniture. Its maximum height is 14,5 cm.
Can the sTread Fold treadmill also be placed upright against a wall?
Yes, the treadmill can also be placed upright against a wall.
Can you also train in Walking mode on the sTread Fold using the remote control when the bar is folded up?
No, the remote control only works when it is folded down.
Can Walk and Run modes on the sTread Fold be used regardless of the position of the handrail?
No, Walk mode at up to 6 km/h is available when the handrail is folded down. Run mode at up to 12 km/h is available when the handrail is folded up.
Can the incline be adjusted on the sTread Fold?
No
What is the maximum user weight for the sTread Fold?
The maximum user weight is 120 kg.
How much power does the sTread Fold treadmill use?
Our treadmill is energy-efficient and has comparatively low power consumption.
Is the sTread Fold compatible with the Sportstech Live APP?
Yes, the sTread Fold is compatible with the Sportstech Live App.
Troubleshooting & Quick Fixes
Remote control only works when folded
The remote control only works when the treadmill is folded (in Walk mode). When unfolded, you can control it directly using the display. Please keep these differences in mind when using the remote control, depending on the state of the machine.
Remote control does not work
Please note that the remote control does not include a battery (CR2032). This must be purchased separately.
Running belt shifts while running
Follow these instructions to tension your treadmill correctly:
1. Choose the right tool - Depending on the model, you will need either a Phillips screwdriver or an Allen key. One of these tools is normally included with the treadmill.
2. Adjust the tension - If the treadmill belt slips, increase the tension by turning the right and left adjustment screws a quarter turn clockwise. If the belt is jammed, reduce the tension by turning both screws a quarter turn counterclockwise.
3. Check the adjustment, then set a speed of 1–2 km/h and walk on the treadmill. If the belt slips (the motor spins without driving the belt), increase the tension. If the belt and motor jam, reduce the tension. Also make sure the belt runs in the centre. If it does not, centre it correctly.
4. If the running belt does not run in the centre, increase the tension on the side towards which it is drifting. (If it runs to the right = tighten the right side slightly or loosen the left side slightly; if it runs to the left = tighten the left side slightly or loosen the right side slightly.) Tighten by no more than a quarter turn at a time, then check again that the belt runs in the centre.
The sTread Fold LED lighting does not work
If the lights are switched off, you can easily turn them on. Press and hold the lower button on the remote control for 5 seconds. The remote control must have a working battery. Alternatively, you can press the light button on the display. You therefore have two ways to activate the lighting.
The support tubes have too much or too little play.
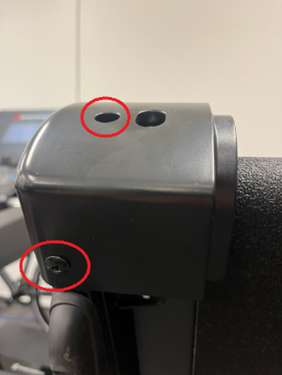
If support tubes 'B' have too much or too little play, follow these steps: Remove the cover cap ('E') from the lower left support tube and set it aside safely. Insert the supplied socket ('F') into the opening so that it fits over the nut. Insert the supplied Allen key ('H') through the holes in the socket. Turn the socket until there is minimal play in the support tubes, while still allowing them to fold easily.
Error SAFE – Safety key
⚠️ Error SAFE – Safety key
Description:
The safety key is not in place or the magnet is too weak. Your treadmill will not start unless the key is correctly in place.
Solution:
Check that the safety key is correctly inserted in its designated position.
Check the magnet strength – if the magnet is weak, you can try using another magnet.
If this does not help, you will need a replacement safety key.
👉 Replacing it is easy to do at home – without voiding the warranty and much more convenient than returning the product. If this does not resolve the issue, we will be happy to collect your device under warranty. Don’t worry: if anything does not go as planned during the replacement and the device is damaged as a result, we will of course take responsibility – provided you have handled the device carefully and respectfully.
Valid for: all models with a safety key
Error 1 – Cable connection
⚠️ Error 1 – Cable connection
Description:
The cable connection between the display, console or PCB in the motor area may be loose, disconnected or faulty.
Solution:
Disconnect the device from the power supply.
Open the motor cover.
Check all plug connections: are they secure, and are any cables broken?
Reassemble the device and test it.
👉 If the problem persists, a replacement circuit board is probably required.
➡️ Replacing it is easy to do at home – without voiding the warranty and much more convenient than returning the product. If this does not resolve the issue, we will be happy to collect your device under warranty. Don’t worry: if anything does not go as planned during the replacement and the device is damaged as a result, we will of course take responsibility – provided you have handled the device carefully and respectfully.
Error 2 – Motor or control board
⚠️ Error 2 – Motor or control board
Description:
The motor or control board needs to be replaced.
Solution:
👉 Order the motor or control board directly via the chatbot.
➡️ Replacing it is easy to do at home – without voiding the warranty and much more convenient than returning the product. If this does not resolve the issue, we will be happy to collect your device under warranty. Don’t worry: if anything does not go as planned during the replacement and the device is damaged as a result, we will of course take responsibility – provided you have handled the device carefully and respectfully.
Error 4 – Voltage problem
⚠️ Error 4 – Voltage problem
Description:
The device is not receiving enough power or the control board is faulty.
Solution:
Disconnect the device from the power supply and wait a few minutes.
Open the motor cover and check the plug connections.
Connect directly to a wall outlet (do not use an extension lead).
Temporarily switch off other power-hungry devices and test again.
If there is no improvement → replace the control board.
👉 You can order replacement parts directly via the chatbot.
➡️ Replacing it is easy to do at home – without voiding the warranty and much more convenient than returning the product. If this does not resolve the issue, we will be happy to collect your device under warranty. Don’t worry: if anything does not go as planned during the replacement and the device is damaged as a result, we will of course take responsibility – provided you have handled the device carefully and respectfully.
Error 5 – Control board / motor
⚠️ Error 5 – Control board / motor
Description:
In most cases, the control board needs to be replaced. If this does not help, the motor is faulty.
Solution:
👉 Order replacement parts directly via the chatbot.
➡️ Replacing it is easy to do at home – without voiding the warranty and much more convenient than returning the product. If this does not resolve the issue, we will be happy to collect your device under warranty. Don’t worry: if anything does not go as planned during the replacement and the device is damaged as a result, we will of course take responsibility – provided you have handled the device carefully and respectfully.
Error 7 – Motor overvoltage
⚠️ Error 7 – Motor overvoltage
Description:
This is often caused by the running belt being tensioned too tightly.
Solution:
Loosen the running belt (as described in the manual).
If necessary, tighten it slightly, but not as much as before.
If the problem persists → replace the motor.
👉 You can order replacement parts directly via the chatbot.
➡️ Replacing it is easy to do at home – without voiding the warranty and much more convenient than returning the product. If this does not resolve the issue, we will be happy to collect your device under warranty. Don’t worry: if anything does not go as planned during the replacement and the device is damaged as a result, we will of course take responsibility – provided you have handled the device carefully and respectfully.
Error 8 – Faulty drive motor
⚠️ Error 8 – Faulty drive motor
Description:
The drive motor is probably faulty.
Solution:
👉 Order the replacement motor directly via the chatbot.
➡️ Replacing it is easy to do at home – without voiding the warranty and much more convenient than returning the product. If this does not resolve the issue, we will be happy to collect your device under warranty. Don’t worry: if anything does not go as planned during the replacement and the device is damaged as a result, we will of course take responsibility – provided you have handled the device carefully and respectfully.
How do I open the motor compartment for maintenance?
Switch off the device and carefully remove the 6 screws on the underside of the device. Carefully open the cover. Please note that the display is connected to the controls. Take care not to cause any damage.
Maintenance and cleaning
Cleaning: After each use, wipe any sweat off the device with a slightly damp cloth. Make sure that no moisture or water gets onto the computer or other electrical or electronic components. Do not use abrasive cleaners or solvents. Maintenance: Check that the device is in good working order before and after every workout. Also check that all fasteners and protective covers are in place and secure. Tighten screws and nuts as needed. Lubrication: For the device to work properly and have a long service life, the running belt must be adequately lubricated with silicone oil. Thin tubes on the underside of the device form the lubrication system. Lubrication and inspection intervals: Top up the silicone oil after the first 25 hours of operation (or every 2–3 months). Check the lubrication regularly. Top up the silicone oil after no more than 50 hours of operation (or every 5–8 months). Checking the lubrication: Make sure the device is unplugged. Lift one side of the running belt and run your finger over the top of the running deck underneath the belt. If the running deck feels slightly oily, it is sufficiently lubricated. If the running deck feels dry, you need to add silicone oil.
The treadmill switches off by itself
When the sTread Fold treadmill is not in use, it switches off after approx. 20–24 seconds. This is not a fault, but the automatic shut-off function. This may happen after every start.
Repair Instructions
Instructions – Replacing the motor on the sTread Fold treadmill
Please watch our repair tutorial on YouTube. Alternatively, you can follow the step-by-step instructions below the video.
Video instructions for replacing the sTread Fold motor:
You can also watch the relevant video instructions directly on YouTube.
Tools required:
- Phillips screwdriver
- Allen keys (sizes 5 and 6)
- 3–5 cable ties
Preparation:
- Position the treadmill on a level surface and disconnect it from the power supply.
IMPORTANT: Wait 2 minutes before opening the treadmill – residual current may be present.
Steps:
- Turn the treadmill over and remove the screws from the motor cover.
- Turn the treadmill back over.
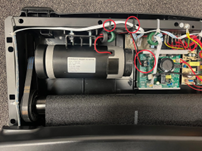
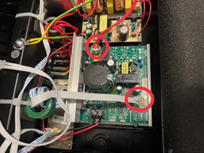
Carefully lift the top cover and disconnect the two plug connections. - Disconnect the motor wires, loosening the screws without removing them. Cut the cable ties.
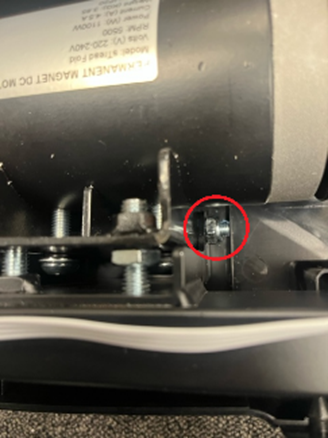
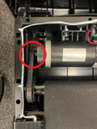
- Loosen the screws on the motor (13 mm wrench, size 5 Allen key).
- Remove the old motor, install the new motor and fit the belt. Tighten the screws.
- Connect the motor wires to the PCB, observing the polarity, and secure the cables with cable ties.
- Reinstall the covers.
Reconnect the plug connections.
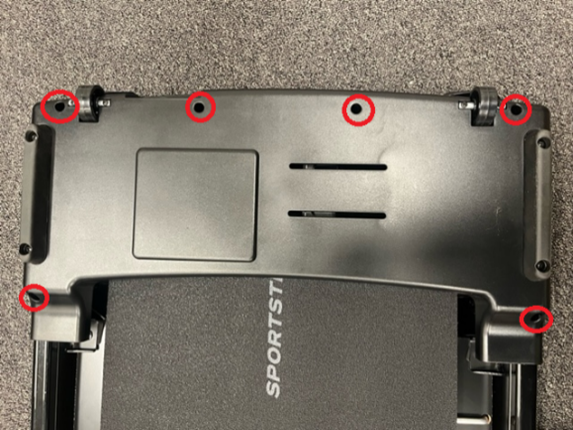
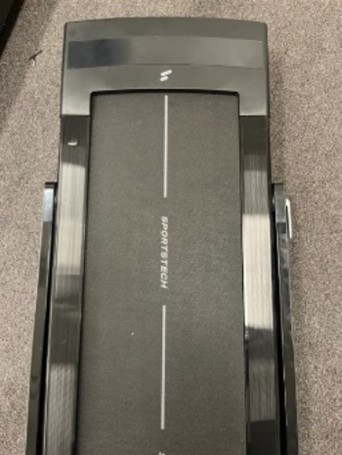
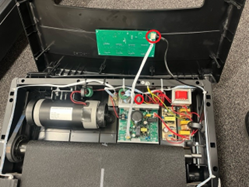
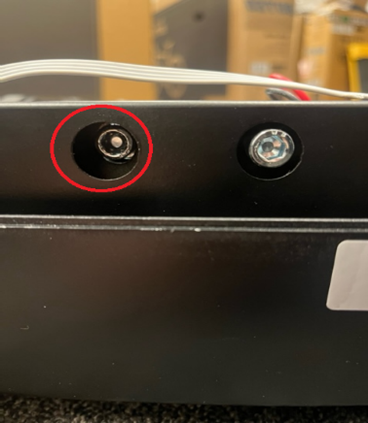
Screw the bottom cover in place
Instructions – Replacing the control board on the sTread Fold treadmill (PCB)
Please watch our repair tutorial on YouTube. Alternatively, you can follow the step-by-step instructions below the video.
You can also watch the relevant video instructions directly on YouTube.
- Tools required:
- Phillips screwdriver - Preparation:
Position the treadmill on a level surface and disconnect it from the power supply.
IMPORTANT: Wait 2 minutes before opening the treadmill – residual current may be present. - Steps:
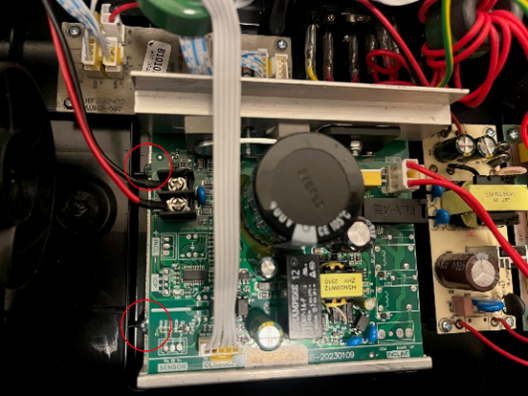
- Remove the top cover (we recommend taking photos of the circuit board).
Turn the treadmill over and remove the screws from the motor cover.
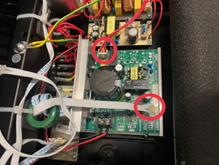
Carefully lift the top cover and disconnect the two plug connections. - Disconnect the electrical connections and loosen the screws on the control board.
- Install the new control board and reconnect the connections.
- Reattach the cover.
Instructions – Replacing the upper display
The following maintenance video shows you how to replace the upper display on the sTread Fold.
You can also watch the relevant video instructions directly on YouTube.
Instructions – Replacing the lower display
The following maintenance video shows you how to replace the lower display on the sTread Fold.
You can also watch the relevant video instructions directly on YouTube.
Instructions – Replacing the running deck on the sTread Fold
Tools required:
– Phillips screwdriver
– Sturdy scraper or putty knife
– Open-ended wrench (10 mm)
- Preparation:
Position the treadmill on a level surface and disconnect it from the power supply.
IMPORTANT: Wait 2 minutes before opening the treadmill – residual current may be present.
Steps:
- Remove the top cover (we recommend taking photos of the circuit board).
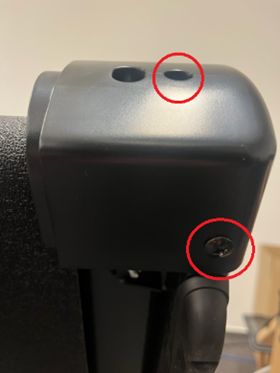
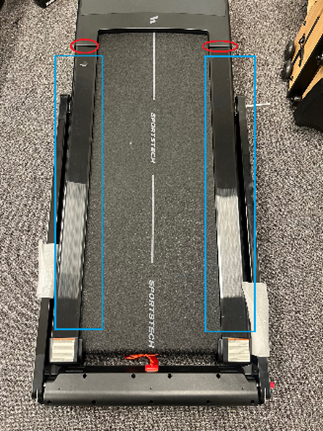
Turn the treadmill over and remove the screws from the motor cover. - Remove the corner trim and side foot panels. Caution: the LED strip is connected to the side foot panel.
- Remove the side foot panels:
The side foot panels are glued in place. Use the scraper or putty knife to carefully remove them. - Remove the damaged running deck and install the new one.
- Attach the foot strips, removing any old adhesive residue and using new adhesive tape.
- Reinstall the motor cover and rear trim.
- Remove the top cover (we recommend taking photos of the circuit board).
```
The spare parts list shows all the individual components used, from assembly through to use.
The manual contains all the important information.